Your Cart is Empty


Metal Grinding Tools: The Complete Guide

Quick Summary
Metal grinding is a crucial process in various industries, using abrasive wheels or belts for tasks like deburring and precision finishing. For best results, it’s essential to use the right metal grinding tools, such as angle grinders, belt grinders, bench grinders, die grinders, and surface grinders, as well as the correct abrasive for each one. In some cases, metal grinding techniques change based on the tool being used, and abrasive materials can vary depending on the metal being worked on.
Metal grinding is a process used in various industries to shape, finish, or refine metal workpieces. It involves the use of abrasive wheels or belts to wear down the surface of the metal, creating the desired shape, surface finish, or dimensional accuracy. This process is typically used for tasks such as smoothing rough edges, deburring, removing welds, sharpening tools, or achieving specific surface finishes on metal parts.
A fundamental step in metalworking, metal grinding is crucial for achieving the required precision and quality in industries such as automotive, aerospace, construction, and more. In this detailed guide, the team at Red Label Abrasives outlines the most important metal grinding tools and how they help ensure the best results across a wide range of projects.
Types of Metal Grinding Tools
When it comes to metal grinding, having the right tool is crucial. Let's take a close look at the various types of tools that professional and hobbyist metal workers rely on to tackle different types of tasks. From abrasive wheels to grinding machines, understanding these tools is key to mastering the art of metal grinding.

Angle Grinders
Angle grinders are commonly used in metal grinding due to their adaptability for various tasks. These handheld power tools, also known as side grinders or disc grinders, feature a rotating abrasive disc that can be switched out for different purposes, like cutting, grinding, polishing, or sanding. Their compact size and maneuverability make them handy for both large-scale industrial projects and smaller, more precise work.
How to Use an Angle Grinder
Before turning up the grinder, inspect it thoroughly. Check for any signs of damage or loose components, ensuring both the grinder and the chosen abrasive disc are in good condition. Next, secure your workpiece firmly in place, either by clamping it or using a stable holding mechanism to prevent any unintended movement during grinding. Position yourself with a stable footing and a firm grip on the grinder with both hands.
Start the grinder and allow it to reach its full operating speed before making contact with the workpiece. While grinding, maintain the proper grinding angle, usually between 15 to 30 degrees relative to the workpiece's surface. Apply light, consistent pressure, allowing the tool to do the work as you move it smoothly across the workpiece.
Additional tips:
- Avoid lingering in one spot for too long to prevent overgrinding.
- To minimize airborne particles, consider using a dust collection system or work in a well-ventilated area.
- When finishing, reduce pressure and make slow passes for a smoother surface.
After completing the task, turn off the grinder, allow it to come to a complete stop, and set it down carefully. Inspect your work to ensure it meets your desired specifications, and when you're finished, store the grinder and abrasive discs in a safe, dry place.
Pros:
- Angle grinders can handle a wide range of abrasive tasks, from smoothing weld seams to cutting through thick metal.
- Their compact design makes them easy to transport and use in tight spaces.
- They operate at high rotational speeds, allowing for efficient material removal.
Cons:
- The high-speed rotation of the abrasive disc can pose safety risks if not handled properly.
- Grinding generates metal dust and debris, which can be harmful if inhaled.
- Angle grinders can be noisy and cause hand-arm vibration, potentially leading to fatigue or injury with extended use.

Belt Grinder
A belt grinder is a stationary power tool mounted on a workbench or a dedicated stand. Belt grinders are used for various metalworking, sharpening, and shaping tasks. Belt grinders are primarily designed for grinding, sharpening, and polishing metal objects, but they can also be used for other materials like wood and plastics, depending on the type of abrasive belt installed.
The key components of a belt grinder include the drive and idler wheels, a motor to drive them, and adjustable tool rests that provide support for the workpiece while it is being ground. Some belt grinders come with additional features like variable-speed motors.
How to Use a Belt Grinder
Verify that the belt is securely mounted and in good condition before you start using the belt grinder. Adjust the tool rests close to the belt (but not too close) to offer proper support for your workpiece and maintain the correct grinding angle. The grinder should be firmly secured to prevent movement or vibration.
With safety in place, start the belt grinder and let it reach its full operating speed before proceeding. Then take the following steps:
- Maintain the proper grinding angle, either as specified in the tool's instructions for sharpening or the desired angle for shaping or deburring.
- Apply gentle, even pressure to the workpiece against the belt, allowing the belt to do the work without excessive force, which can cause overheating or premature wear.
- Continuously move the workpiece smoothly across the belt, avoiding extended grinding in one spot to prevent overheating and uneven wheel wear.
Take breaks as needed to prevent overheating of the belt sander, which can lead to damage or decreased effectiveness. Periodically stop to inspect your work, ensuring you're achieving the desired results. If necessary, make adjustments to the tool rests or your technique. When you've completed the grinding task, turn off the belt grinder and allow it to come to a full stop before setting it down safely.
Pros:
- Belt grinders are versatile tools suitable for a wide range of metal grinding tasks, including sharpening, deburring, shaping, and polishing.
- They provide precise control over the grinding process, allowing for accurate shaping and sharpening of metal objects.
- The rotation speed of belt grinders remains consistent, resulting in uniform grinding and polished finishes.
Cons:
- Belt grinders are stationary tools, meaning the workpiece must be brought to the grinder, which may not be practical for large or unwieldy objects.
- Belt grinders can sometimes be used for grinding smaller details, but they’re not the best tool to use for intricate work.
- Using a belt grinder effectively requires skill and experience to maintain the correct grinding angle and pressure for different tasks.
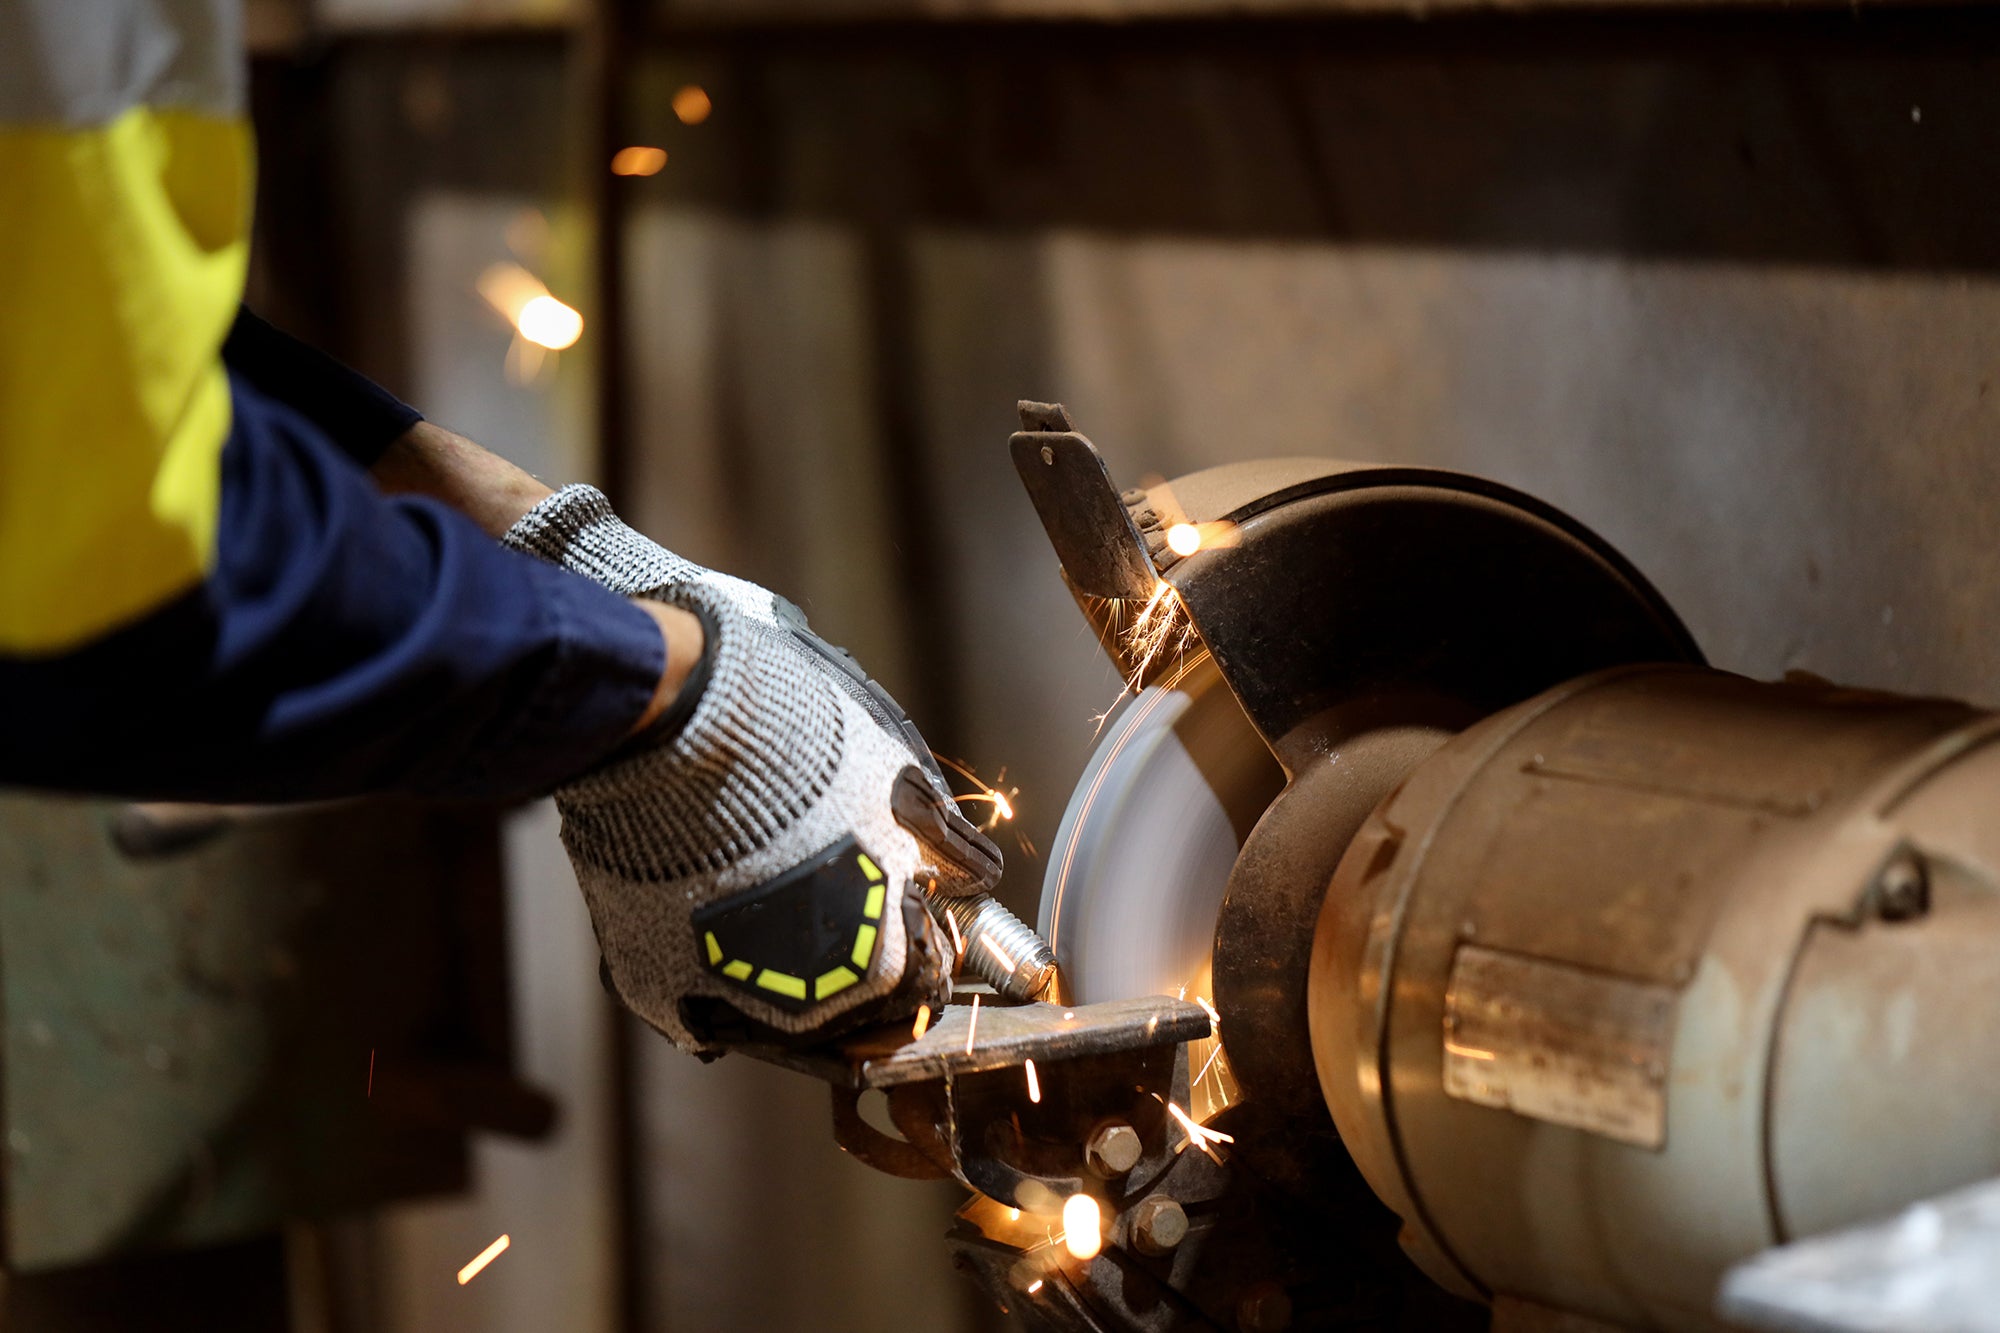
Bench Grinders
A bench grinder is a staple tool in many workshops and garages. It's a stationary power tool that's typically mounted on a workbench or a dedicated stand. Bench grinders serve a variety of purposes in metalworking, woodworking, and general maintenance tasks. These versatile tools are designed for tasks such as sharpening, shaping, and polishing a wide range of materials, from metal to wood and even plastics, depending on the type of grinding wheel used.
The core components of a bench grinder include two grinding wheels (one coarse and one fine), a motor to power the wheels, adjustable tool rests, and protective eye shields. Some models may also feature adjustable speed settings, making them more adaptable to different tasks and materials.
How to Use a Bench Grinder
Using a bench grinder effectively requires proper setup and technique. Ensure that the bench grinder is securely mounted to your workbench or stand. Make sure the wheels are properly aligned and that the grinder is stable to prevent vibration. Position the adjustable tool rests close to the grinding wheels, providing support for your workpiece. Adjust them to the desired angle for sharpening or shaping.
Turn on the bench grinder and allow it to reach its full operating speed before use. Once the grinder reaches full operating speed, you can start grinding with the following steps:
- Maintain the proper grinding angle as specified in the tool's instructions or based on your requirements.
- Apply gentle, even pressure to the workpiece against the grinding wheel. Avoid excessive force, which can cause overheating or premature wheel wear.
- Keep the workpiece moving smoothly across the wheel to prevent overheating and ensure even grinding.
Periodically stop to inspect your workpiece, making sure you're achieving the desired results. Adjust the tool rests or your technique if necessary. Make sure to take breaks as needed to prevent overheating of the grinding wheels. Overheating can lead to damage or decreased effectiveness. After completing your grinding task, turn off the bench grinder and allow the wheels to come to a full stop before setting it down safely.
Pros:
- Bench grinders are versatile tools suitable for a wide range of tasks, including sharpening tools, shaping metal and wood, and removing rust or burrs.
- They offer precise control over the grinding process, allowing for accurate and consistent results.
- Bench grinders are relatively easy to maintain and can provide years of reliable service.
Cons:
- Bench grinders are stationary tools, which means you need to bring your workpiece to the grinder, which may not be practical for large or unwieldy objects.
- They are not ideal for intricate or detailed work that requires fine precision.
- Using a bench grinder effectively requires skill and practice to maintain the correct grinding angle and pressure for different tasks.

Die Grinders
Die grinders are handheld power tools used for precision grinding, shaping, and polishing tasks, particularly in metalworking and automotive applications. They are named "die grinders" because they were originally designed for use in tool and die making, where precision and fine detail work are crucial. These tools are compact and typically feature a rotating spindle with a collet that can accept various grinding bits, burrs, or abrasive attachments.
Die grinders operate at high rotational speeds, allowing for efficient material removal and fine detailing. They are available in both pneumatic (air-powered) and electric versions. Their compact size and lightweight design make them easy to handle and maneuver, even in tight spaces. They can also accept various attachments and accessories, including grinding stones, carbide burrs, sanding drums, and wire brushes, which enhance their versatility.
How to Use a Die Grinder
Start by choosing the right attachment for your specific task, making sure it is securely and correctly installed in the die grinder's collet or chuck. Before turning on the machine, thoroughly inspect it for any visible damage or loose components. Verify that all safety guards and shields are in place and functioning properly.
With safety in check, secure the workpiece firmly to a workbench or another stable surface and take the following steps:
- Turn on the die grinder using the designated switch or trigger, allowing it to reach its full operating speed before you begin grinding.
- When grinding, maintain a firm grip on the die grinder with both hands, controlling the tool's movement and pressure as you work.
- Apply light, even pressure to the workpiece, allowing the tool to do the work efficiently.
- Periodically stop and inspect your work to ensure it meets your desired results, making any necessary adjustments to the tool's speed or your technique as needed.
If the workpiece or die grinder becomes too hot to handle, take breaks to allow them to cool down; overheating can damage both the workpiece and the tool. When you've completed the grinding task, turn off the die grinder and allow it to come to a complete stop before setting it down.
Pros:
- Die grinders operate at high rotational speeds, allowing for efficient material removal and fine detailing.
- They can accept various attachments and accessories, such as grinding bits, carbide burrs, sanding drums, and wire brushes, enhancing their versatility.
- Some die grinders come equipped with features like variable speed control and ergonomic grips to provide better control and comfort during operation.
Cons:
- Die grinders are handheld tools, which means that the workpiece often needs to be brought to the tool, making them less suitable for larger or unwieldy objects.
- The grinding bits or attachments on die grinders wear over time and may require frequent replacement, adding to maintenance costs.
- Grinding with die grinders produces dust and debris that can be hazardous if not properly managed, necessitating the use of effective dust collection systems or proper ventilation.

Surface Grinders
A surface grinder is a machine tool used for precision grinding of flat surfaces, typically metal workpieces. It consists of a grinding wheel that rotates horizontally and a worktable that moves the workpiece beneath the grinding wheel. Surface grinders are widely used in metalworking, manufacturing, and toolmaking industries for achieving high-precision surface finishes, flatness, and dimensional accuracy on a variety of materials, including metal, plastic, and ceramics.
These grinders are crucial tools in industries such as aerospace, automotive, mold making, and tool and die production. They are used to produce components with flat and precise surfaces, including engine blocks, molds, dies, and machine tool components. They come in various sizes and configurations, ranging from small manual machines to large, computer numerically controlled (CNC) models capable of automated precision grinding.
How to Use a Surface Grinder
Prepare the machine by turning on the main power switch and, if applicable, the coolant system. Select the appropriate grinding wheel based on your workpiece's material and finish requirements, securely mounting it on the spindle. If needed, dress the grinding wheel to ensure it's true and sharp, typically using a diamond dresser or dressing tool.
Proceed to prepare your workpiece by securely clamping or magnetically holding it to the surface grinder's worktable. Ensure that the workpiece is level and properly aligned with the grinding wheel. Adjust the worktable's height to position the workpiece just beneath the grinding wheel, making use of the machine's controls for precision adjustments.
Once everything is set up, take the following steps:
- Gently lower the grinding wheel to make contact with the workpiece's surface, using the machine's handwheels for longitudinal and transverse movement to feed the wheel.
- Begin with a light cut on the initial pass, avoiding excessive pressure to prevent overheating and wheel wear.
- Gradually increase the depth of cut by adjusting the feed rate using either the machine's automatic feed controls or handwheels, monitoring the quality of the surface finish with each adjustment.
- Continue grinding in passes, slightly overlapping each pass, until you achieve the desired surface finish and dimensions.
- Maintain a steady feed rate and wheel speed throughout the process.
If your surface grinder is equipped with a coolant system, ensure it is correctly adjusted and functioning to maintain a cool workpiece and grinding wheel, as well as reduce airborne dust. Upon completing the grinding operation, shut down the spindle motor and coolant system if used.
Pros:
- These machines are known for their ability to maintain precise dimensions, critical in industries like aerospace and tool and die manufacturing.
- Surface grinders can produce exceptional surface finishes, which is crucial for components requiring low surface roughness.
- Surface grinders can be equipped with various types of grinding wheels, allowing customization for different materials and finishes.
Cons:
- Surface grinders can be hazardous due to the potential for sparks, flying debris, and the risk of the workpiece being pulled into the machine if not properly secured.
- They can produce loud noise levels and vibrations during operation, requiring hearing protection and ergonomic considerations.
- These grinders require regular maintenance, including wheel dressing and replacement, to maintain their performance.
Choosing the Right Abrasives
Choosing the right abrasives for your metal grinding tasks is crucial to getting good results. They come in various forms, including grinding wheels, grinding discs, and sanding belts, each designed for specific purposes. In this section, we'll explore the types and considerations for each type of abrasive.
Grinding Wheels
Grinding wheels come in several types, each tailored for specific tasks:
- Straight Grinding Wheels:These are the most common type, suitable for grinding flat surfaces, cylindrical workpieces, and internal surfaces.
- Cylinder Wheels: Designed for grinding cylindrical surfaces and contours.
- Tapered Grinding Wheels: Ideal for grinding tapered workpieces and intricate shapes.
- Diamond and CBN Wheels:These super abrasive wheels excel at grinding hard and brittle materials like carbides and ceramics. Diamond wheels are used for grinding non-ferrous materials, while CBN (Cubic Boron Nitride) wheels are suitable for ferrous metals.
When choosing a grinding wheel, consider the following factors:
- Wheel Material:Select the appropriate abrasive material (e.g., aluminum oxide, silicon carbide, diamond, CBN) based on the workpiece material and hardness.
- Grit Size:The grit size determines the coarseness or fineness of the abrasive. Coarser grits remove material faster, while finer grits provide a smoother finish.
- Wheel Hardness:The hardness of the wheel affects material removal rate and wheel wear. Softer wheels are more forgiving but wear faster, while harder wheels maintain their shape longer but may generate more heat.
- Wheel Bond:The bonding material holds the abrasive grains together. Different bonds offer varying levels of wheel durability and suitability for specific tasks. Common bonds include vitrified, resin, and metal.
Grinding Discs
Grinding discs, also known as abrasive discs or cutting wheels, are designed for cutting and grinding operations. Common varieties include:
- Metal Cutting Discs: Used for cutting metal, including steel and stainless steel.
- Masonry Cutting Discs: Designed for cutting masonry materials like concrete and stone.
- Flap Discs:Combining grinding and finishing, flap discs are versatile and suitable for various materials. At Red Label Abrasives, we sell flap discs featuring our Edgecore Ceramic, which are perfect for different types of metals.
Selecting the appropriate grinding disc involves considering:
- Material Compatibility:Ensure the disc is suitable for the material you intend to cut or grind.
- Disc Diameter: Choose the right size that fits your grinder and provides the necessary cutting depth or grinding area.
- Grit Size:For flap discs, consider the grit size for the desired finish; lower grits remove more material, while higher grits provide a finer finish.
Sanding Belts
Sanding belts are flexible abrasive belts used for sanding and finishing operations. They come in different varieties:
- Aluminum Oxide Belts: Commonly used for general-purpose sanding on wood, metal, and plastic.
- Zirconia Belts:Suitable for heavy material removal and tough applications, particularly on metal.
- Silicon Carbide Belts: Ideal for sanding non-ferrous metals, plastics, and glass.
- Ceramic Belts: Known for their high performance and durability, they excel in heavy-duty applications.
When selecting a sanding belt, consider the following:
- Belt Grit: Choose the appropriate grit size for the desired surface finish and material removal rate.
- Backing Material:Consider the type of backing material (e.g., cloth, paper, polyester) and its durability.
- Belt Size:Choose the correct belt size compatible with your sanding equipment and workpiece dimensions.
By understanding the types and factors to consider when selecting abrasives like grinding wheels, grinding discs, and sanding belts, you can make informed decisions to ensure optimal results in your metal grinding and finishing tasks.
The Abrasives You Need To Grind Metal Right Every Time!
Metal grinding is a process that shapes, refines, and perfects metal workpieces, allowing them to meet the high standards of precision and quality demanded by industries ranging from automotive to aerospace. But mastering metal grinding doesn't stop at knowing your tools; it's also about selecting the right abrasives for the job.
Grinding wheels, grinding discs, and sanding belts each have their specific roles, and understanding their types and applications is pivotal for success. Whether you're dealing with intricate detail work or heavy-duty material removal, the choice of abrasive can make all the difference.
At Red Label Abrasives, our abrasive products are compatible with a wide range of industries and applications. We're also here to provide guidance, answer questions, and supply the high-quality abrasives you need to achieve exceptional results. If you have questions or would like to place an order, call 844-824-1956 or fill out our contact form today!


Our Most Popular Abrasives

EdgeCore Ceramic Sanding Belts

EdgeCore Ceramic Flap Discs

Buffing Kit
Shop By Product Category


Why Choose Red Label?

